

- API Setup – use the API to pass E-Verify credentials directly for an employer. This avoids requiring the administrator to key them in manually through Embedded Mode.
- Embedded Mode Setup – generate a secure, embeddable link that allows an administrator to sign in and configure E-Verify credentials through the UI. This remains the method for ongoing credential updates.
Option 1: Configure E-Verify using the API
Use the following endpoint to establish E-Verify credentials for an employer with an active E-Verify account: POST/v1/employers/{employerId}/everifySettings
Request
Request elements
E-Verify mapping
Below you’ll find screenshots from the E-Verify portal where you can find the data needed for the request.| E-Verify Portal | |
|---|---|
| Company ID | 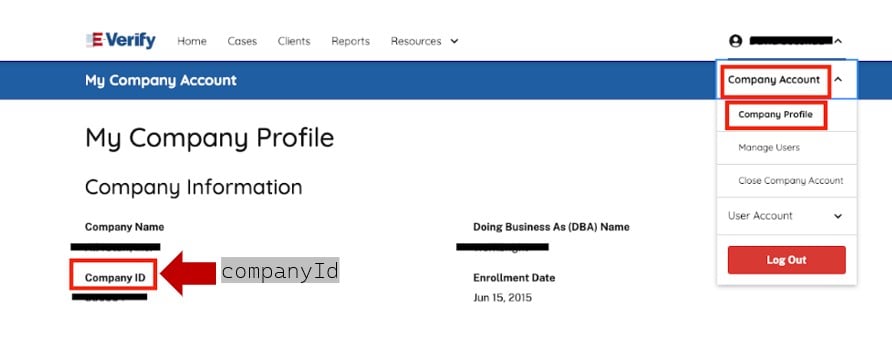 |
| User Credentials | 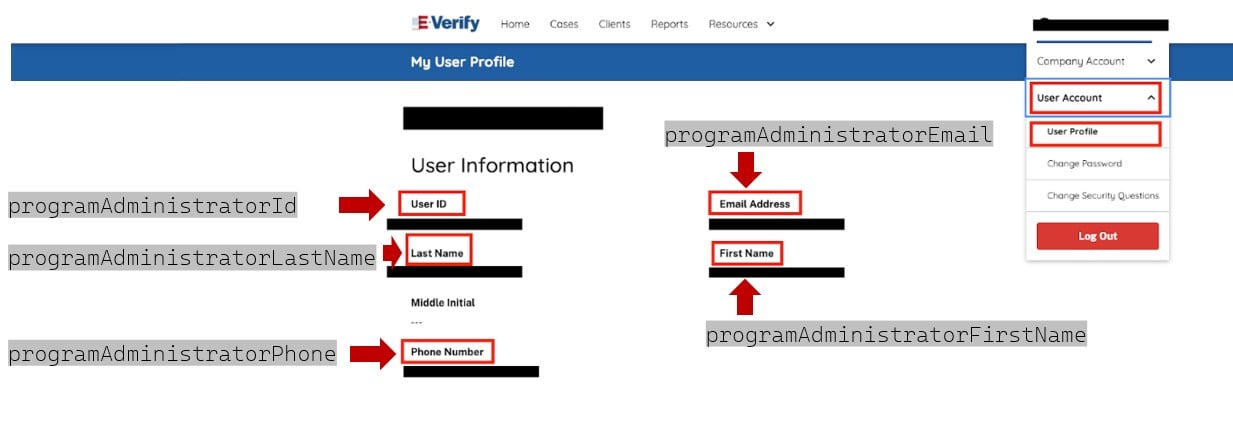 |
| Webservice Credentials: navigation to webservice user | 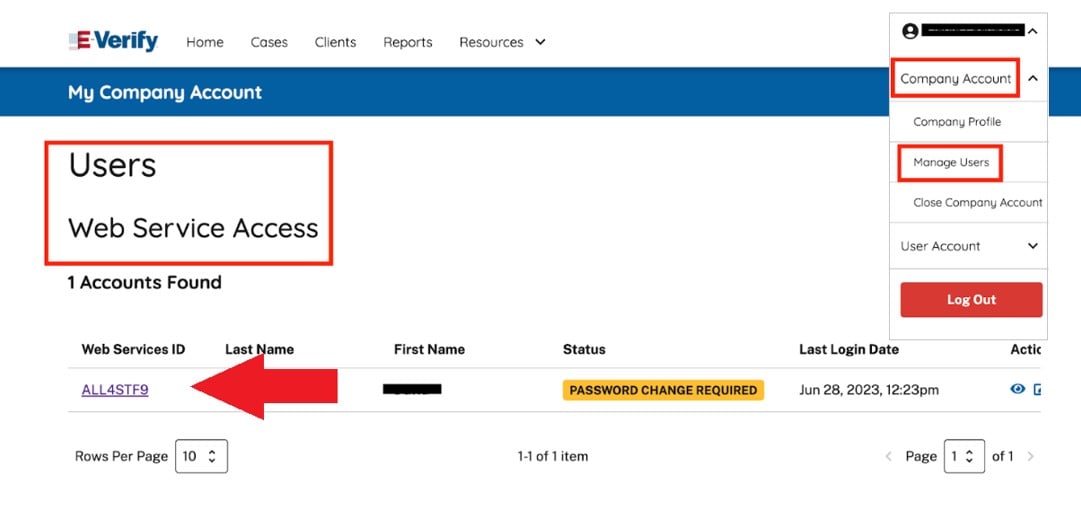 |
| Webservice Credentials: webservice username and password | 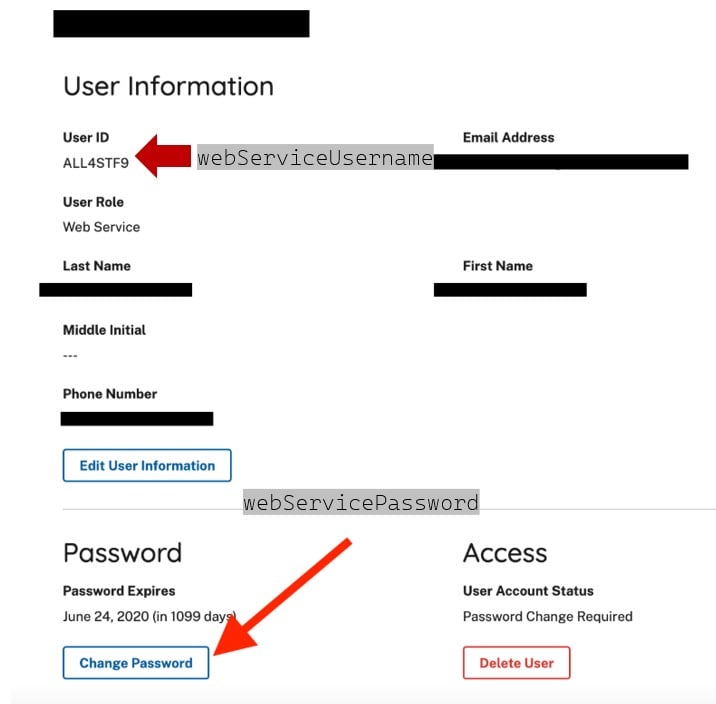 |
Response
The API will return the saved E-Verify settings in theeverifySettings object.
Option 2: Configure E-Verify via embedded mode
The embedded E-Verify settings page lets a company administrator enter the employer’s E-Verify credentials directly in your platform. It collects the same values as the API request above, so the administrator can complete setup without you handling credentials.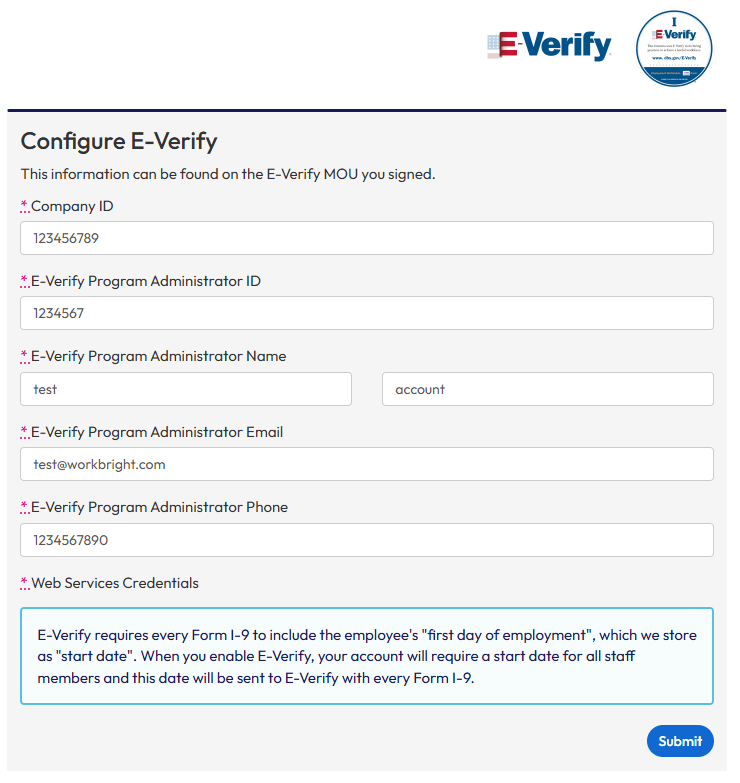
Embedded E-Verify settings page
- Authenticate the administrator using the
authenticateUri - Navigate to the
embeddedUrito complete the configuration
Enabling E-Verify makes start date mandatory. E-Verify requires every Form I-9 to include the employee’s first day of employment, which Symmetry stores as
startDate. Once E-Verify is enabled, a startDate is required for every employee under that employer and is sent to E-Verify with each Form I-9. See Configure Employees & Administrators for where that field is set.Generate E-Verify configuration page
The/employers/{employerId}/admins/{adminId}/everifySettings/generateEverifySettingsUri GET endpoint generates a secure, embeddable link to the E-Verify configuration for a valid administrator. Once embedded in your platform, the administrator can complete the form to enable automatic E-Verify case creation for all completed Forms I-9 under the employer.
Request
Path parameters
Response
A successful response returns atoken object with two URLs: one for authentication and one for accessing the configuration page.
Two-step implementation process
To integrate the E-Verify settings page into your platform:- Authenticate the administrator using the
authenticateUri: this one-time-use token link signs the user in securely - Embed or redirect to the
embeddedUri: this opens the E-Verify settings form for configuration- The administrator must be signed in using the
authenticateUribefore accessing theembeddedUri, or the page will not load properly.
- The administrator must be signed in using the
Response elements
Below are the fields returned in thetoken object.
Monitor E-Verify Credential AuthenticationSubscribe to the
employer.everifyAuthenticationResult webhook event to receive updates on E-Verify credential authentication. Authentication occurs when credentials are added or updated and continues to run daily, so this event may be sent regularly.