Batch
Batch allows you to run multiple minimum wage rates lookups at once using employees' work addresses. Batch returns applicable wage rates in bulk in a CSV.
Create a Batch
CSV batch
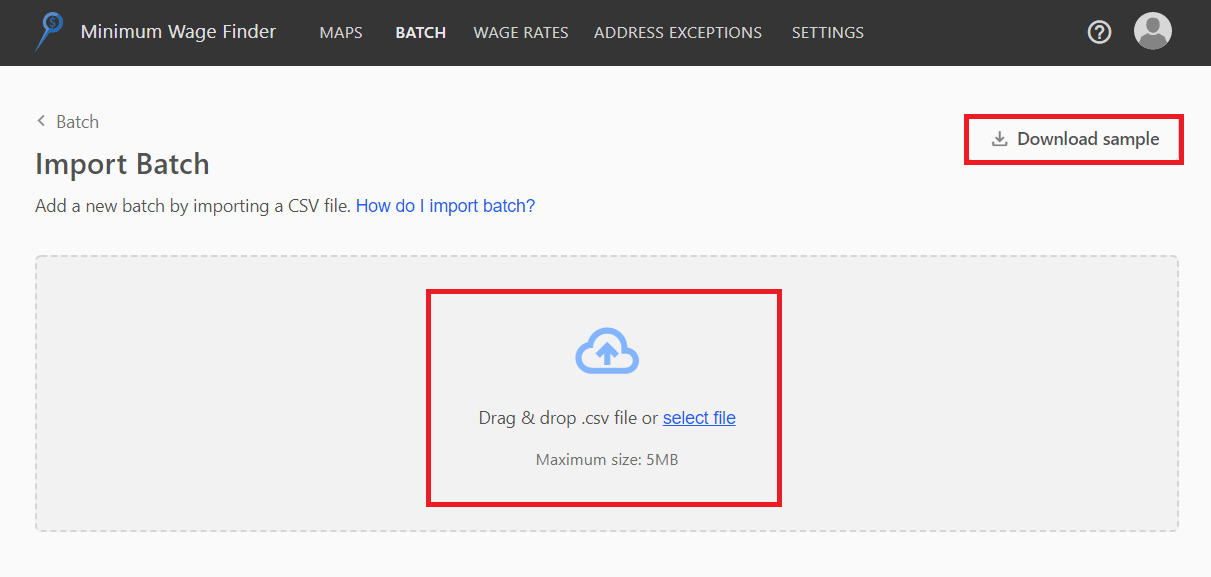
- From within the Batch tab, click on the “Import batch” button.
- Download the sample batch template and populate the required fields. Each line should contain one work address for the employee.
The batch upload file size limit is 5MB.
- Upload the completed CSV file.
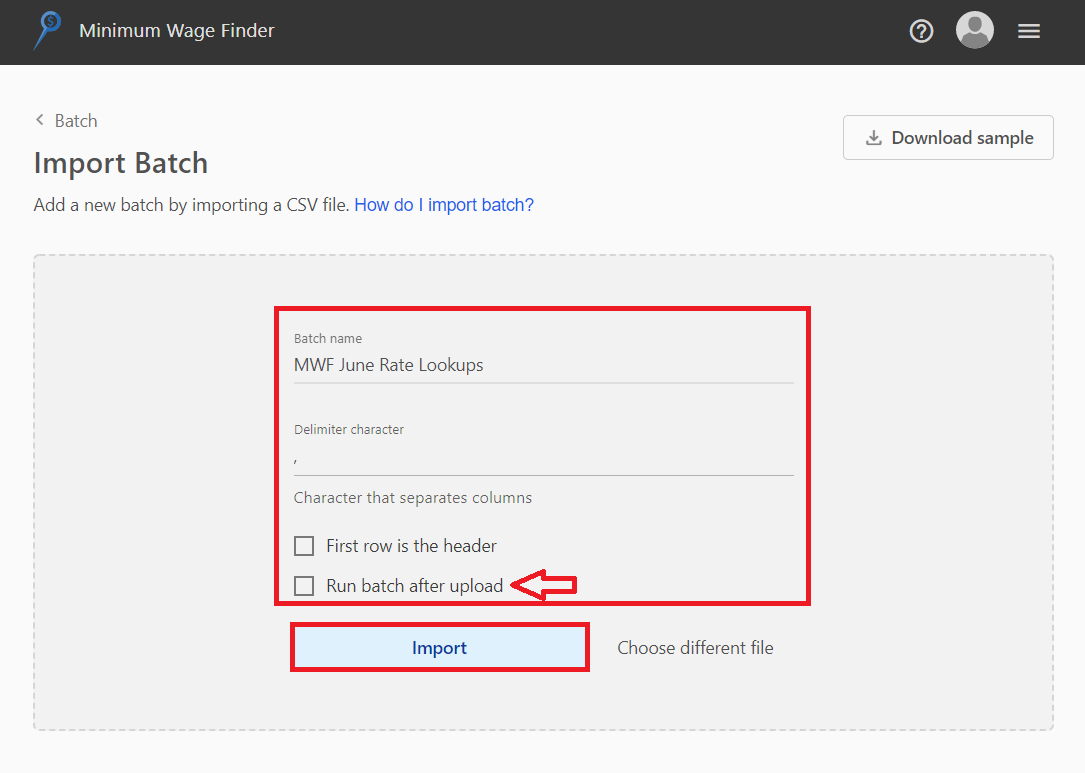
- Enter the batch name (required) and adjust the other settings as needed:
a. Update the delimiter character that will separate the columns in your CSV file. This will default to a comma (the delimiter used by the downloadable sample).
b. Select “First row is the header” if your CSV file includes a header row (select this if using the downloadable sample). Leave this unchecked if you do not have a header row in your CSV file.
c. If desired, select “Run batch after upload” to retrieve tax information immediately after uploading. - Click “Import” to upload your data to Payroll Point.
- A success message will appear if all rows are successfully processed. At this point, the batch has successfully completed!
a. If one or more rows were not processed and taxes were not returned for a home and work address pair (e.g., when a required data point is missing from the CSV file), the batch status will read “Invalid” or “Incomplete” and you can correct the error and reprocess the record(s).
Manual Batch
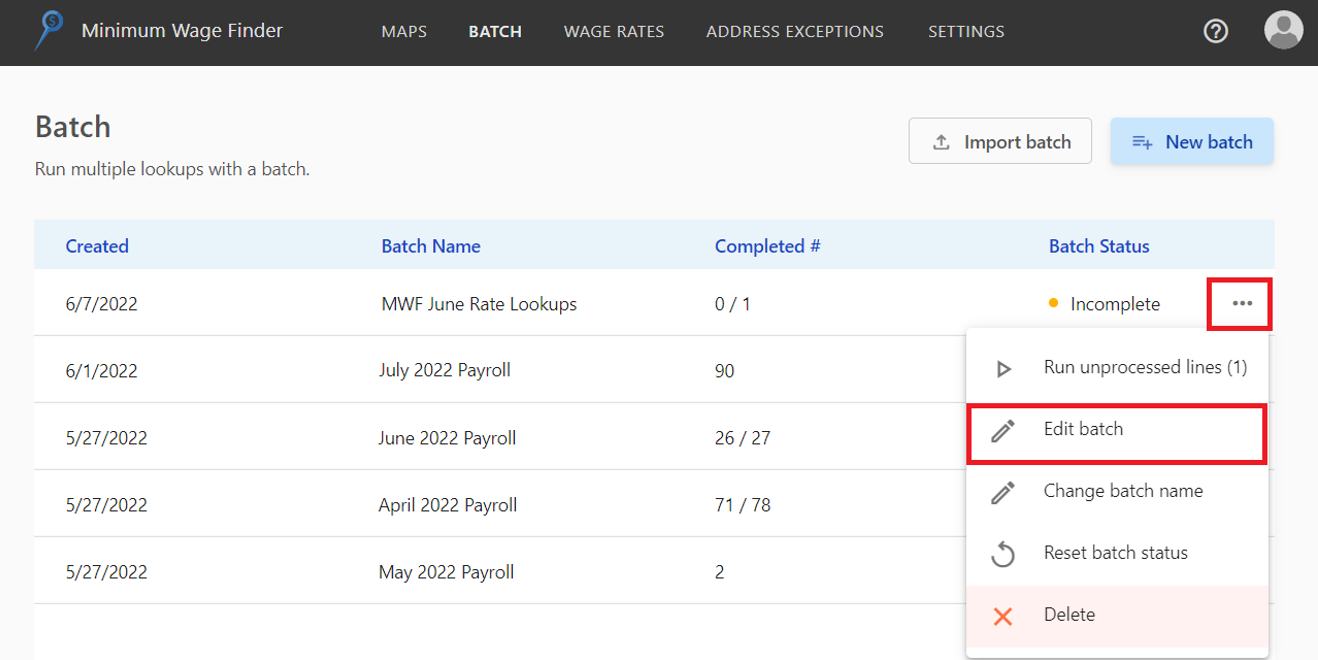
- From within the Batch tab, click on the “New batch” button, enter a descriptive name for your batch (e.g., March 2022 new hire rates) and click “Save.”
- Click on the batch row (or click on the ellipsis icon and select “Edit batch” from the dropdown) to begin adding new lines of employee home and work address pairs to your batch.
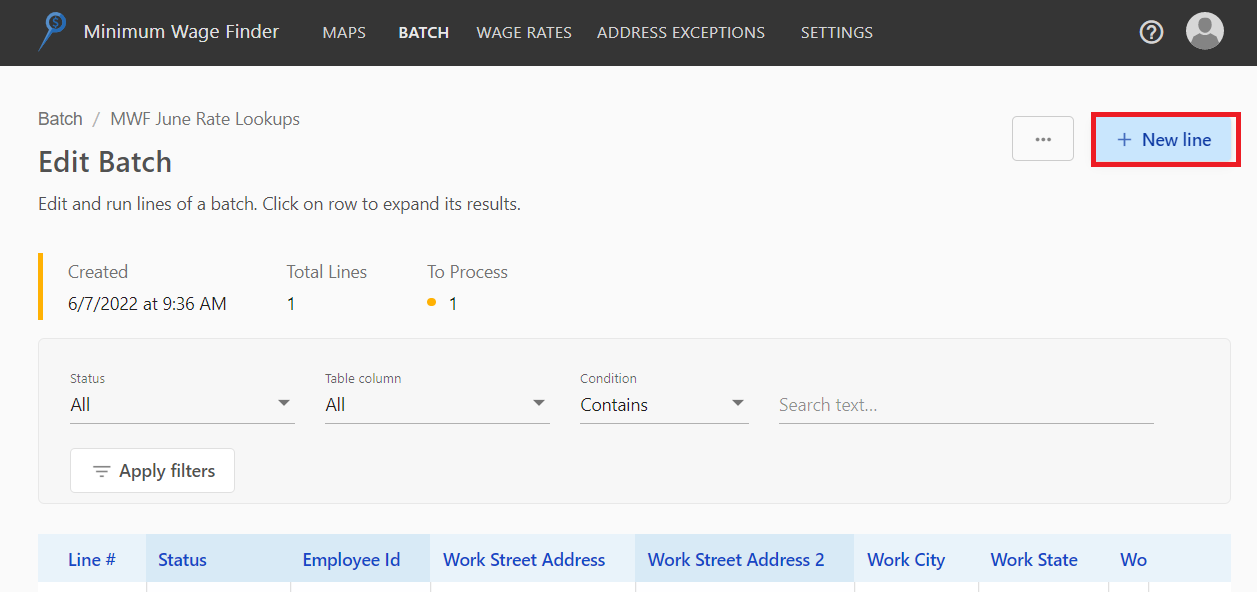
- From within the Edit Batch page, click “New line.”
- Enter in the employee’s information, including their work and home address locations, and click “Save.” See "Manually Entering Batch Data" in Appendix A for the full list of data points required when manually entering a new batch line.
- Continue adding new lines to the batch by repeating steps 3 and 4 until you are finished.
Run a Batch
- Verify the global batch settings for your company are correct.
- From within the Batch tab, click “RUN” in the row for the batch you wish to run.
a. The number in parentheses represents the number of records in the batch. In the example below, 136 lookups (representing 136 work addresses) will be processed.

- Once successfully run, the batch status will display “Completed.” Select “MIN WAGE” to see the minimum wage rate results from the lookups in the batch file.
a. Each rate returned is one row in the results table. Therefore, one lookup may have multiple rows returned in the results table.
b. If one or more rows were not processed and rates were not returned (for example when a required data point is missing from the CSV file), an error message will appear with directions on how to fix the error.

Download Minimum Wage Data
- From within the Batch tab, find the batch results you wish to download, click on the ellipsis, and select “View minimum wage” from the dropdown.
- From within the Minimum Wage Results table, click on "Download."
Data Retention Policy
Batch file uploads and results are retained for 30 days from the day the batch file
was uploaded to Payroll Point.
Process Errors
Import Errors
- After importing the CSV batch file (see instructions above), navigate to the batch table results by clicking on the Batch tab.
- Find the batch that contains import errors, indicated by the red “IMPORT ERROR” flag.
a. The number in parentheses indicates the number of lines in the batch that contain import errors. A line that contains an error will not be processed when the batch is run. Therefore, it’s critical to remedy the errors so that minimum wage results can be returned for each work address. - Click on the “IMPORT ERROR” button to display the import error messages.

- Correct the errors in the following ways:
a. If the batch has not been run:
i. Delete the existing batch by clicking the ellipsis icon and select “Delete” from the dropdown.
ii. Correct the errors within the batch CSV file and reimport the file.
b. If the batch has been run:
i. Manually delete the existing lines with errors, add new corrected lines, and click “RUN.”
Minimum Wage Rate Lookup Errors
- After importing a CSV batch file (see instructions above), navigate to the batch table results by clicking on the Batch tab.
- Find the batch you just ran that contains invalid data, indicated by the “Invalid” Batch Status, and click on the row to begin editing that batch.

- Search for the line(s) that contain invalid data (where Status = “INVALID”) and click on the record in the table to display the error message.

- On the line that contains invalid data, click the pencil icon to begin editing.

- Correct the invalid data and click “Save changes.”
- A dialogue box will appear informing you that the status of the line was updated to “TO_PROCESS” and remind you that you will need to reprocess this record. Click “Close” to close the dialogue box.

- Reprocess the corrected line(s) by doing one of the following:
a. Run each tax lookup in-line by selecting “RUN” on the individual record in the Edit Batch table.
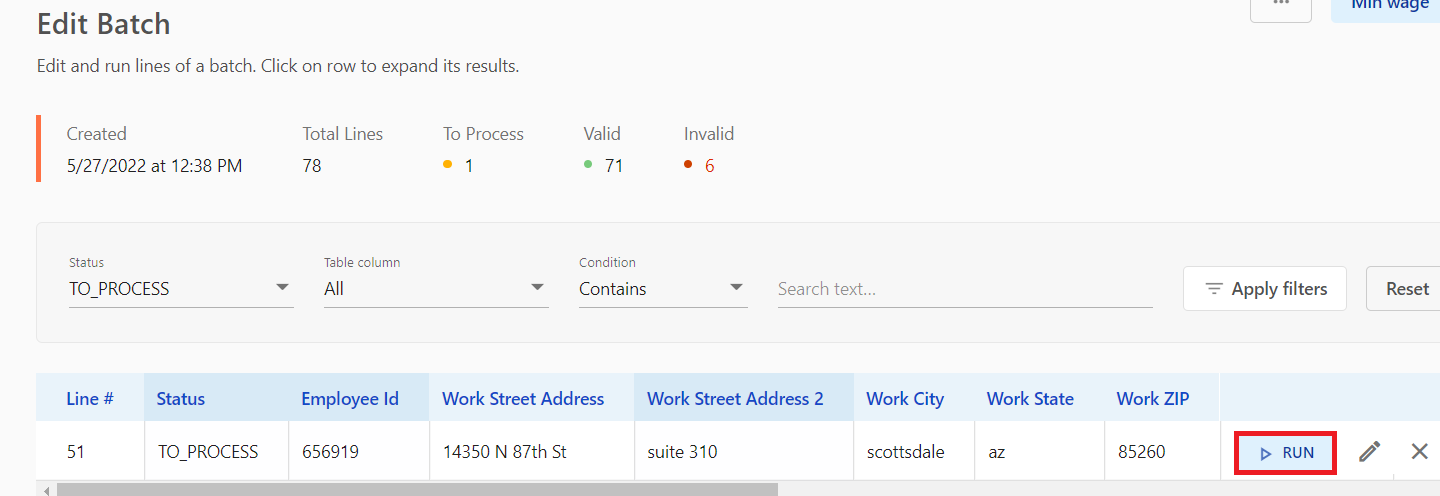
b. Run the tax lookups in bulk by navigating back to the Batch tab and clicking the “RUN” button. Lines that have already been successfully processed with the batch will not be run again.

Updated 7 months ago
